White Dial Conversion
Tired of the old black face dials? Can't read em properly at night? This simple make over kit gives your car the RS looking gauge cluster simply and easily. White dial kits are available for most cars, a simple search online will find em. I bought a kit for my capri off ebay. Fitting the kits will be fairly universal. Athough the kits seem pricy for what is basically a sticker.. it does look good.
You have to remove your gauge cluster, don't try and put them on in situ. Just take apart your dash and unscrew all the fixings. The speedo unplugs from the back, the oil gauge is a threaded connection to undo. The rest is all connected via the main loom plug.
Pull apart the cluster, on my capri, there is several plastic covers to remove as seen in the photos.
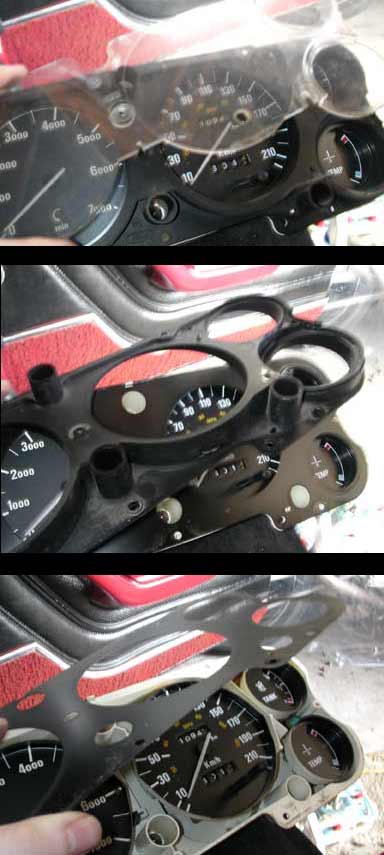
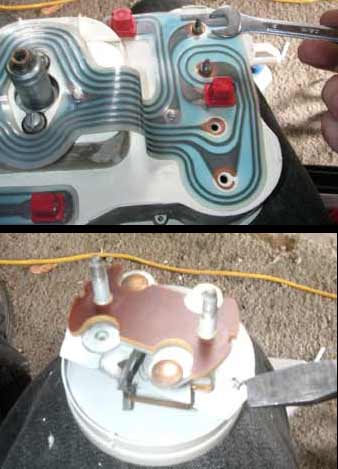
This is the reverse side of the cluster. Be careful not to damage the wiring circuit. The gauges can be removed one at a time undoing the small nuts & washers at the back.
While you are at it, pull out the red lightbulb fixtures and fit a new set of bulbs. It will brighten up your gauges a lot.
This is the reverse of one gauge. You must now very carefully pry off the front face using a screwdriver to ease out the locating pins. 30 year old gauges like this are delicate things.. quite brittle it is easy to break them if you go animal on em. Also, take care not to disrupt the gauge mechanism itself as it can be fiddle to put back together. I broke one of my gauge faces, luckily I had a spare cluster to find a replacement... just be easy!
Here you can see the front face coming off. Clean the surface with a wipe of meths.
Peal off the correct decal. You don't want to go putting the wrong face on the wrong dial. I'm sure you're not that stupid though...Light spray on the reverse side with some soapy water. This gives it a bit of temporary movement to get the decal in exactly the right place. I found some of the smaller gauge decals needed a small strip sliced off the edge to get it to fit nicely. Keep some sissors handy.
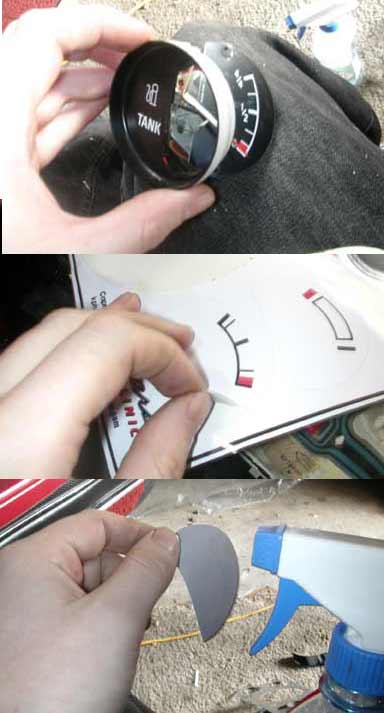
With the decal fitted and smoothed down. You can carefully push the front face back on the dial.
There won't be holes for the locating pins but you can just put them through.
Then do the same with the front face, a wipe with meths, and then fit the decal. However, I found it easier not to wet the back of these ones, otherwise it makes it difficult to get that small strip to seal.
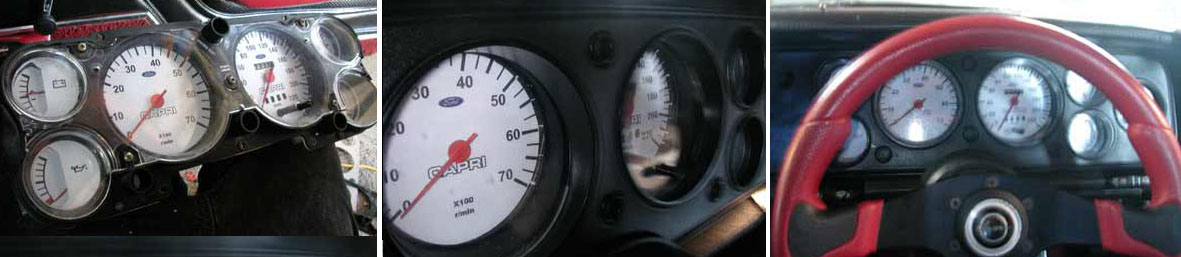
Here are the results! Well worth the effort I say. This is a great cheap alternative to aftermarket gauges, especially if you want to keep a more factory look.
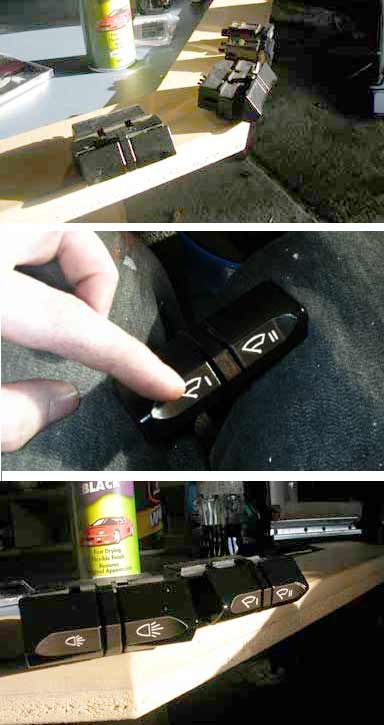
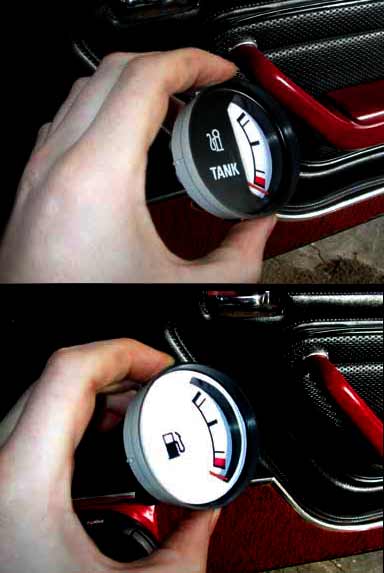
Button Make Overs
While you are at it how about re-surfacing those worn out buttons of yours? I'm sure you know which button does what by now.. but it hardly looks tidy eh.
Kits for buttons are available from the same places as the white dial kits. I paid AU$20 for a kit. I consisted of six button faces.
Remove your buttons. If you have a capri like mine then they will just disconnect from the plugs.
Clean them with meths and then give them a spray with 'bumper black' paint. This re-juvinates the black surface and make it look new again.
Resurfacing them is a matter of pealing off the decal and fitting in the correct posting. Don't wet these ones, just take your time and it's easy.
Once you have done all your buttons, give them a spray with a clear sealant. This will keep them looking new for ages.
Re-fit and you are done!