SavageBob
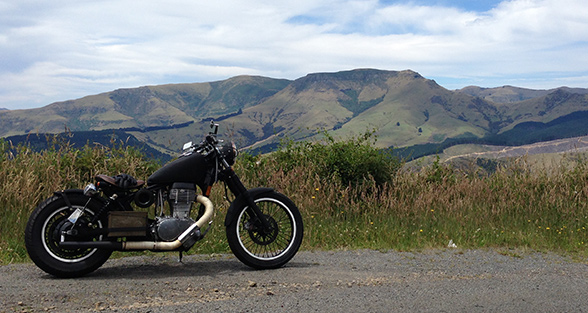
1988 Suzuki Savage Bobber

A bobber is a stripped single seater city cruiser and suddenly I wanted one. Looking around I found that the Suzuki Savage is an ideal canidate. It's got many good features some good some bad - just like any bike. It's powered by a 650cc Big Single (thumper) which has a truely unique helicopter sound.. (chop chop chop chop chop). Not actually that powerful mind you - only around 30hp stock but there is more power to be unlocked fairly easily to give around 45hp. Still nothing amazing but it makes up with a truck load of torque (50ft-lb) low in the revs. Which should make for a fantastic traffic light blaster.
It's also light weight at around 160kgs stock. I'm pretty sure I've ripped off at least 20 - 30kgs of crap. The Savage is a realitively small motorbike similar in size to a Harley Sportster ( HD 883: 85.8" long, 59.8" wheel base, 250kgs. Savage: 85.8" long, 58.3 wheel base, 160kgs).
They're quite cheap and plentiful for parts. They are very, very simple tech to work on. Don't be fooled into thinking because it's Japanese it's all fancy. The Savage is practically a 1950s motorcycle and whilst it's not called a Savage anymore the Suzuki S40 Boulevard still being made today is nearly exactly the same.
Known faults and how to fix them
The Savage has a couple of well known faults which you will find listed on suzukisavage.com
1. The fuel tap / petcock is vacuum operated and prone to sticking and causing issues that seem like carb problem. If you're doing a Savage the first thing you want to remove, even if it's fine, is the fuel tap. In it's place fit one off a Yamaha Raptor 660 YFM660R. part no. 5LP-24500-01-00. Here is the cheapest place to buy it online: http://www.boats.net/parts/detail/yamaha/Y-5LP-24500-01-00.html Since this is a manual fuel tap you'll need to block off the vacuum line if you're running the standard carb.
2. There is a plug/cap which is the cuase of nearly all the common oil leak that coast the fins around the front of the engine. The cause it quite simple, it neads sealant but the manual doesn't mention it. So most people including dealerships and mechanics are careless with this plug and it leaks. Here it is in detail: http://suzukisavage.com/cgi-bin/YaBB.pl?num=1099227295/0#0
3. The cam chain tensioner is a problem. Eventually if left unchecked it will pop out and potentinally cause irreparable damage. Here is the solution: http://suzukisavage.com/cgi-bin/YaBB.pl?num=1180206459
4. The starter gears on pre-95 models are another potential issue. It's possible that on shut-down the engine can kick backwards and break the gears. You can replace the gears from a 95+ but you will have to replace the stator cover as well. The later gear is much deeper and the old cover won't fit. The other option, which is what I did, is re-work the old cover. You need to cut down the shaft mount in the cover by 28mm from the cover edge, and drill the hole down 40mm from the cover edge. Then you need to file and fit, drill, file and fit, drill file and fit - until it does nicely. The gear also needs washers on each side of it. The trick to getting it sweet is to work at it without the washers, then when it fits you know you are close and just a little more filed off and the washers go on and it's good. Also note I needed to turn the primary drive gear (connects to starter motor) around to get it to line up nice. Here is a link for more information: http://suzukisavage.com/cgi-bin/YaBB.pl?num=1288911670/0#0
This might seem like a bit of a list. But consider this, most bikes have weak points, these are pretty straight forward and it's all mapped out for you so you know in advance. Suzukisavage.com is a brilliant source of information.
Here is the start of my bike: 1988 Suzuki Savage 650 4-speed with 17,000kms on the clock.

Here is where I began with SavageBob. I pretty much rode it round the block to get a fresh WOF before parking up in garage. Savages between '87 and '94 had the 4-speed box and '95+ have the 5-speed. The thing is, the 5-speed is useless. The 5th gear is basically the same ratio as the 4th gear in the 4-speed. So it makes almost no difference at all only you have to do one more gear shift. The 4-speed has a nicer spread of gears so it's the better choice in that regard. Why did they do that you ask? Purely for sales. In the early 90's nobody wanted a 4-speed bike.. everyone wanted the 5-speed and to compete with Honda, Suzuki slapped another gear in to make it a 5 speed. Shit huh?
That is the upside on the older model. The other upside is that the carb will have larger jets and won't be running so lean. Not that I care cos I'm ripping all that off anyway. The downsides are the ugly as sin buckhorn handlebars.. those have gotta go. And the starter gears are a known fault as mentioned above.
It's a fun bike to ride, but oldschool - compared with my other bike (1998 Suzuki Bandit which has large twin discs, multi-carb, 4-cylinder etc) this couldn't be more different. But it sounds so cool! thump thump thump.

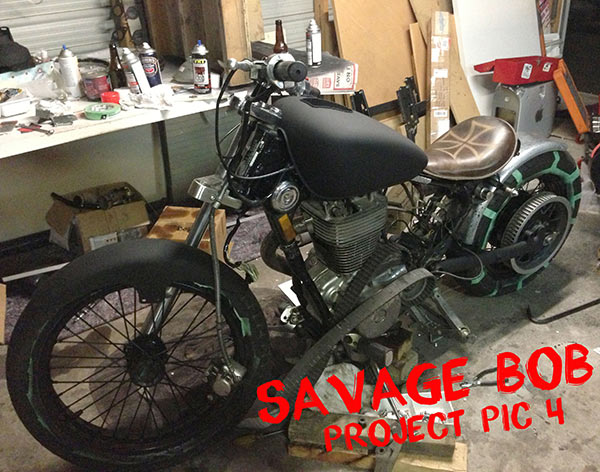
After a coupe of hours this is what it looked like. It's fun, rip everything off it and pile it up. Looks like there will be lots of matt black spray-painting to be done.

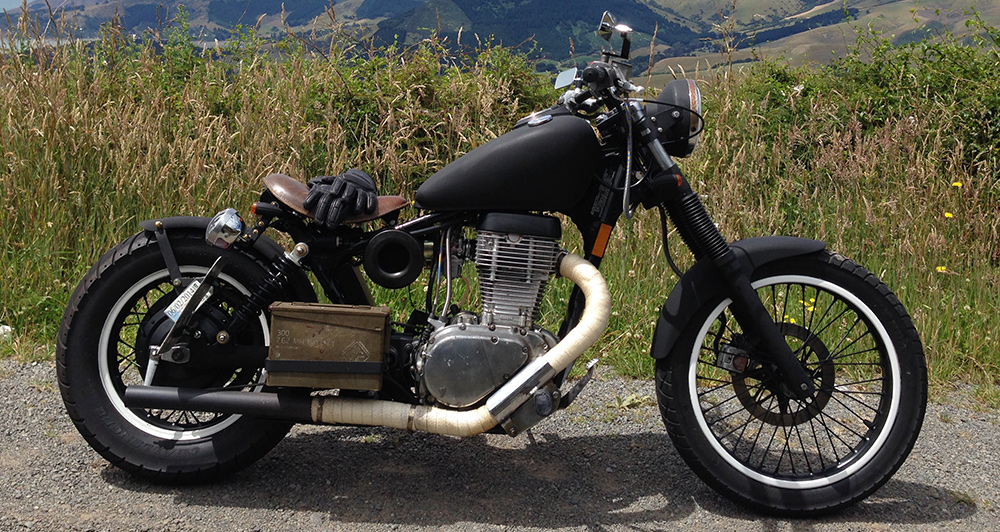
The first major thing to sort is the rear fender. I found several options. Firstly I could hack back the existing fender but that looks like crap. Secondly I could order a kit from these guys in the US http://bluecollarbobbers.com which is a beautiful fender, but it will only work with a stock tyre 140/80/15 and is also a bit pricey to get shipped to New Zealand. Mine is a 140/90/15 which is actually a better size and more accurate for the speedo. The BCB kit is a bolt-on step-by-step kit which makes things real easy. They are also super nice people! But I get the feeling that their kits are aimed at people who don't spanner too much, the way they mount their fender might be easy - but it's not idea. So I made my own for a fraction of the cost using a cheap trailer fender. It's just sitting on the tyre in the pic above not mounted to anything.
The reason the BCB fender must use a small stock tyre is because the bolt around the front of the swing-arm (rear wheel frame). This encroaches on the precious space. A better way is to weld a simple L bracket instead. BCB mount their side supports off their axle, I think it's nicer to make some little tabs off the arm itself. I just bent up the supports from some flat bar I found. Painted em black, used the dome nuts and bolts from the original fender.


Pretty easy to do really. Some people mount the fender straight to the main frame under the seat supports which is even easier. But I think that looks kinda naff having a massive gap.. looks too sporty for the kind of thing I'm doing. So keep the fender on the swing arm it will go up and down with the tyre so you had keep it hugging the type.
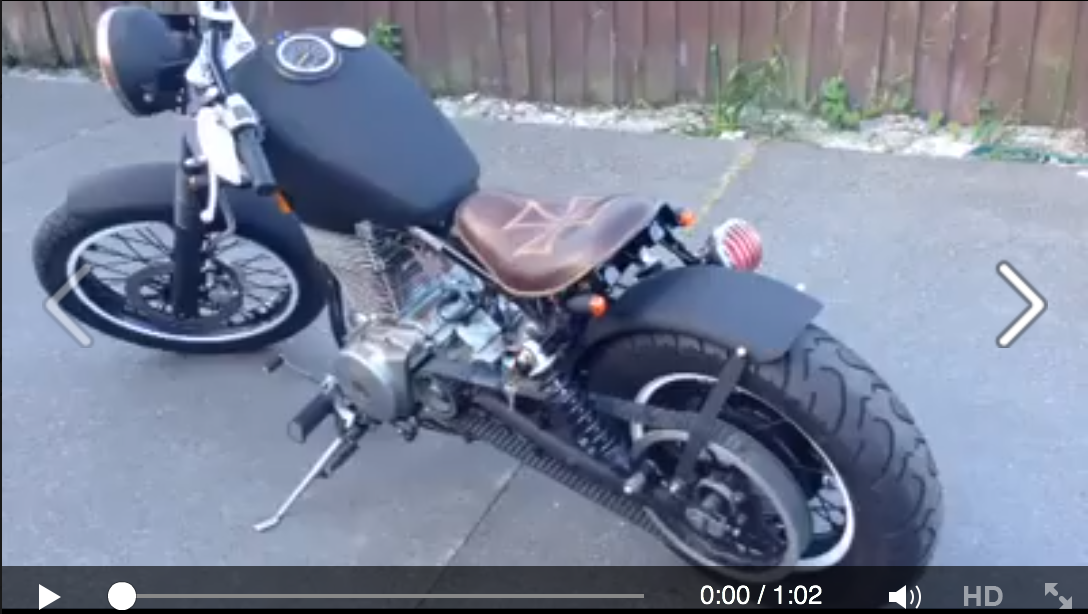
For the seat I mounted it straight onto the frame. If you're keeping rear shocks you don't need to spring the seat in my opinion. My seat came with a the the front mount peice and the rear bracket and springs. I ditched the springs and used the spring tabs for the rear indicator mounts. I bent up a simple bracket which bolts to the original seat mounts on the frame and then bolted the seat to the bracket. Leaving the right side of the bracket long to mount the stop light. I bought a univeral single-seat mount for the front and bolted that to the original font seat mount so it attaches in the same way with the two tank bolts. The only thing I didn't like was the seat sitting up onto of the bolt heads from the bracket I made. So I filed down the bolt heads a bit to make them slimmer and then drilled holes into the seat mount so the bolts sit in and everything sits snug.


At the other end, the first thing to go were the ugly buckhorn handlebars. I went for a set of black drag-bars from here: http://bluecollarbobbers.com/product/drag-bar-kit-1 (I also got the low profile mirrors, they have tons of cool stuff but bit pricey for my budget build so I couldn't have everything) You can use any 1" bars from a Harley as well. But these bars are just the right size at 32" with 4" pull. I replaced the head-light with a big old lamp I found lying around mouted off the forks with simple brackets. Ebay is a great place for cheap turn signals and I got the mini bullet indicators which I made some simple brackets that mount off the original clamp. At the same time I drained the brake fluid and replaced pads with Kevlar units front and back. http://www.amazon.com/2005-2011-Suzuki-Boulevard-Kevlar-Carbon/dp/B00CQBFRDQ/ref=pd_sim_sbs_auto_3
Exhaust
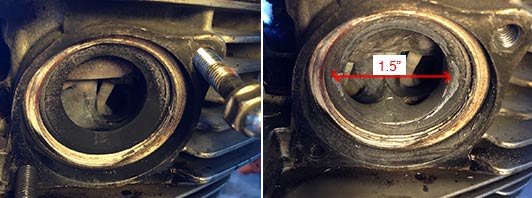
The stock exhaust is horrible. Starting with a power restrictive ring that's been put (intentionally?) into the port which you can grind out. Then into a tiny 1.3" header pipe and finished off with a restrictive muffler. The easiest and proven muffler change is for a Harley Dyna muffler which bolts straight on. But this wasn't the look I wanted so I went with a straight drag-pipe with 2 baffle rings inside it. Then I ditched the header pipe and had the local exhaust shop make me up a 1.5" inside dia header. Going from 1.3" to 1.5" doesn't sound like much but that extra diamenter all the way through the pipe makes a big difference to flow.

Then I took to the port. You can do this with the engine still in bike.
1. Make sure the exhaust valves are closed.
2. Stuff paper towels deep into the ports.
3. Spray some shaving foam in which expands and fills over the paper towels.
4. Get your dremil and take to that restrictive lip. Open it up to match your header size (1.5" if you're making a header as well). Concentrate on the ring, don't get carried away anywhere else, the top flat area has the valve springs above it so I didn't touch this area. Polish it all up and then reach in with needle pliers and pull out the paper towels which will come out like a plug and take the cream with it (and shavings). Stick vaccum cleaner in and huff up the last bits. Make sure it's nice and clean before reassembly.
Mini Battery Mod
The stock battery can be ditched for a high-power mini battery. I used a MotoBatt BTZ27S which whilst has less CCA from the stock battery it's more than enough to kick over a Savage. Under the swing arm, barely seen, is a shelf holding a engine breather cannister. Basically this is just for meeting emissions targets, allowing crank breathing vapours to recirculate back into the intake. You don't need it. Unbolt and rip it out. I then ripped all the junk off it until I just had the base. Fold up the front and back until the battery is snug. I didn't want the yellow showing so I also wrapped the battery with black rubber as well. I found I didn't even need to extend the stock wiring. Although, because the battery it going to be hard to get to, I wired up some extensions for a plug to charge it under the seat. Easy as.